Using Albumentations to augment keypoints
In this notebook we will show how to apply Albumentations to the keypoint augmentation problem. Please refer to A list of transforms and their supported targets to see which spatial-level augmentations support keypoints. You can use any pixel-level augmentation to an image with keypoints because pixel-level augmentations don't affect keypoints.
Note: by default, augmentations that work with keypoints don't change keypoints' labels after transformation. If keypoints' labels are side-specific, that may pose a problem. For example, if you have a keypoint named left arm and apply a HorizontalFlip augmentation, you will get a keypoint with the same left arm label, but it will now look like a right arm keypoint. See a picture at the end of this article for a visual example.
If you work with such type of keypoints, consider using SymmetricKeypoints augmentations from albumentations-experimental that are created precisely to handle that case.
Import the required libraries
Define a function to visualize keypoints on an image
KEYPOINT_COLOR = (0, 255, 0) # Green

def vis_keypoints(image, keypoints, color=KEYPOINT_COLOR, diameter=15):
    image = image.copy()

    for (x, y) in keypoints:
        cv2.circle(image, (int(x), int(y)), diameter, (0, 255, 0), -1)

    plt.figure(figsize=(8, 8))
    plt.axis('off')
    plt.imshow(image)
Get an image and annotations for it
image = cv2.imread('images/keypoints_image.jpg')
image = cv2.cvtColor(image, cv2.COLOR_BGR2RGB)
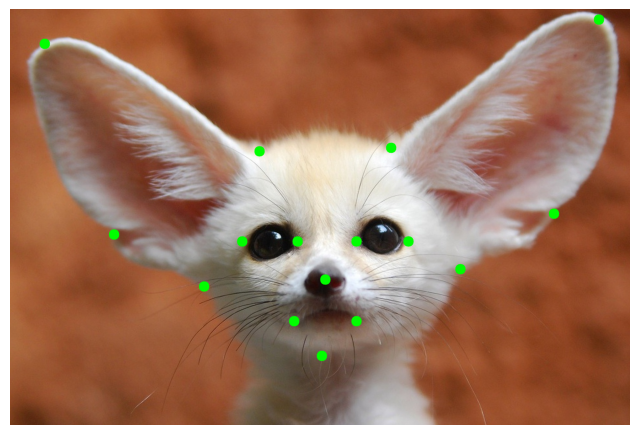
Define keypoints
We will use the xy format for keypoints' coordinates. Each keypoint is defined with two coordinates, x is the position on the x-axis, and y is the position on the y-axis. Please refer to this article with the detailed description of formats for keypoints' coordinates - https://albumentations.ai/docs/getting_started/keypoints_augmentation/
keypoints = [
    (100, 100),
    (720, 410),
    (1100, 400),
    (1700, 30),
    (300, 650),
    (1570, 590),
    (560, 800),
    (1300, 750),
    (900, 1000),
    (910, 780),
    (670, 670),
    (830, 670),
    (1000, 670),
    (1150, 670),
    (820, 900),
    (1000, 900),
]
Visualize the original image with keypoints
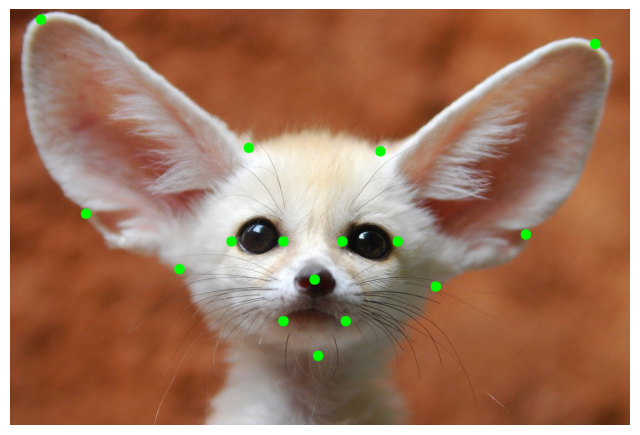
Define a simple augmentation pipeline
transform = A.Compose(
    [A.HorizontalFlip(p=1)],
    keypoint_params=A.KeypointParams(format='xy')
)
transformed = transform(image=image, keypoints=keypoints)
vis_keypoints(transformed['image'], transformed['keypoints'])
A few more examples of augmentation pipelines
transform = A.Compose(
    [A.VerticalFlip(p=1)],
    keypoint_params=A.KeypointParams(format='xy')
)
transformed = transform(image=image, keypoints=keypoints)
vis_keypoints(transformed['image'], transformed['keypoints'])
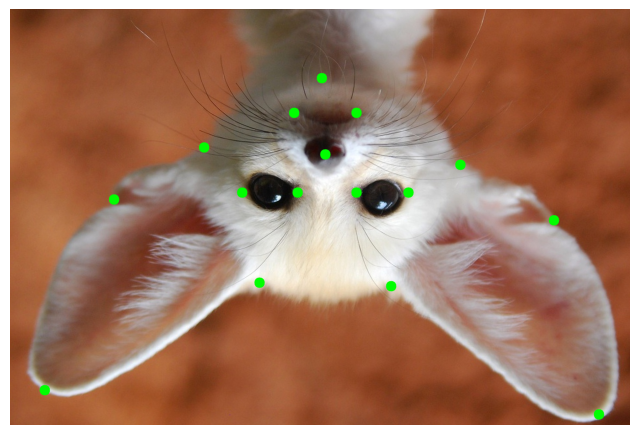
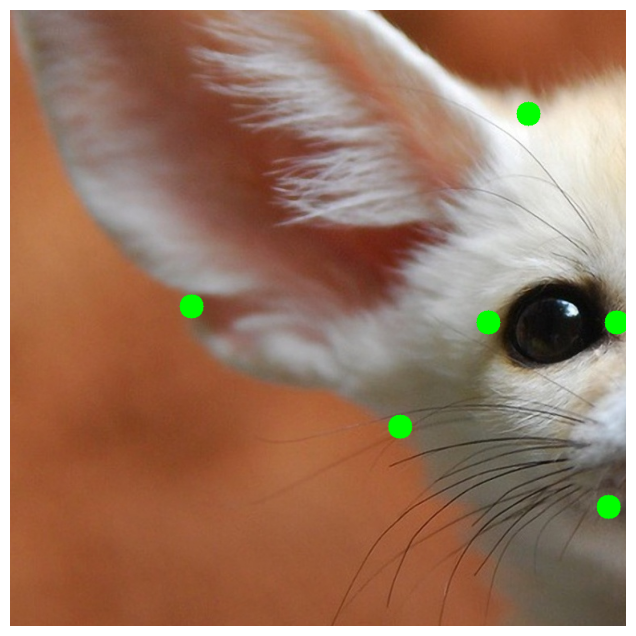
We fix the random seed for visualization purposes, so the augmentation will always produce the same result. In a real computer vision pipeline, you shouldn't fix the random seed before applying a transform to the image because, in that case, the pipeline will always output the same image. The purpose of image augmentation is to use different transformations each time.
random.seed(7)
transform = A.Compose(
    [A.RandomCrop(width=768, height=768, p=1)],
    keypoint_params=A.KeypointParams(format='xy')
)
transformed = transform(image=image, keypoints=keypoints)
vis_keypoints(transformed['image'], transformed['keypoints'])
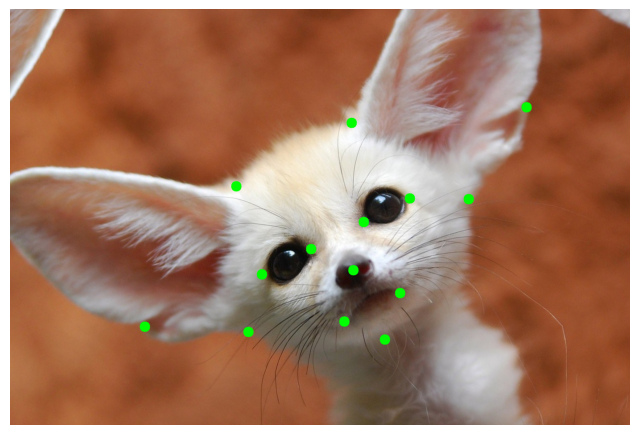
random.seed(7)
transform = A.Compose(
    [A.Rotate(p=0.5)],
    keypoint_params=A.KeypointParams(format='xy')
)
transformed = transform(image=image, keypoints=keypoints)
vis_keypoints(transformed['image'], transformed['keypoints'])
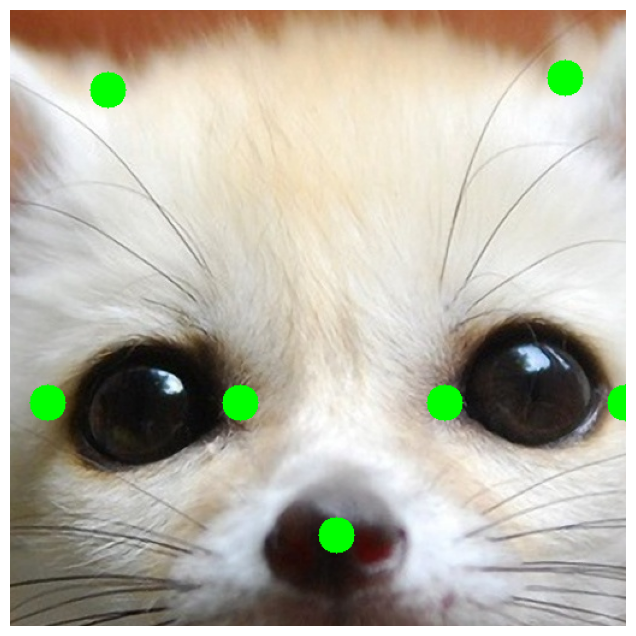
transform = A.Compose(
    [A.CenterCrop(height=512, width=512, p=1)],
    keypoint_params=A.KeypointParams(format='xy')
)
transformed = transform(image=image, keypoints=keypoints)
vis_keypoints(transformed['image'], transformed['keypoints'])
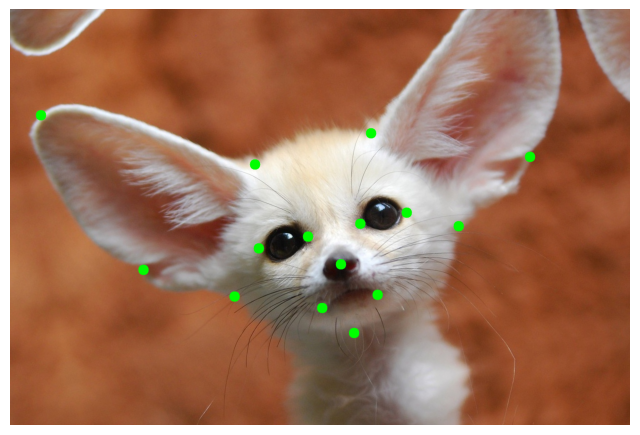
random.seed(7)
transform = A.Compose(
    [A.ShiftScaleRotate(p=0.5)],
    keypoint_params=A.KeypointParams(format='xy')
)
transformed = transform(image=image, keypoints=keypoints)
vis_keypoints(transformed['image'], transformed['keypoints'])
An example of complex augmentation pipeline
random.seed(7)
transform = A.Compose([
        A.RandomSizedCrop(min_max_height=(256, 1025), height=512, width=512, p=0.5),
        A.HorizontalFlip(p=0.5),
        A.OneOf([
            A.HueSaturationValue(p=0.5),
            A.RGBShift(p=0.7)
        ], p=1),
        A.RandomBrightnessContrast(p=0.5)
    ],
    keypoint_params=A.KeypointParams(format='xy'),
)
transformed = transform(image=image, keypoints=keypoints)
vis_keypoints(transformed['image'], transformed['keypoints'])
